Made By a Fabricista: Butterick 6260 Becomes a Little Striped Jacket


The idea for this jacket has been buzzing in my head for some time and I just knew it had to become a reality before all the southern "cold" weather went away.
The pattern is Butterick 6260 which is a Lisette pattern and I am a huge fan of these patterns. I have had great success with several Lisette patterns and I find the designs modern, well thought out and they consistently yield great versatile pieces in my wardrobe.

When my chosen fabric arrived from Fabric Mart I was so pleased with the texture, colors and hand of the wool suiting. I chose a Wool/Nylon blend flannel suiting of which there were two colorways but it now looks like one of the colorways recently sold out. Maybe you were one of those lucky people to snatch some of it up.
When working out my fabric choices for a jacket like this I like to try out my ideas on me-made coloring pages. For coloring pages, I grabbed the image of the jacket from the Butterick website and saved it to a Picasa file, printed it out and used color pencils to get a working idea of how my jacket might look. I was playing with the idea of a jacket made completely of the striped suiting but I also had a length of gorgeous wool left over from this sheath dress made last winter for Fabric Mart that I thought would make a beautiful contrast. I also created a pin board with striped jackets to envision how I might place my stripes.
In the end, I decided to use the contrasting wool for the sleeves and I am glad I did since I think it brings a casual vibe to the end product.

Lets talk stripe matching for a bit....
If you've ever made a garment with stripes you know that the design will look best if prominent stripes line up and you also know that making that magic happen takes some added effort. I think every single time I start a sewing project with stripes I ask myself "now why did I want stripes? ugh!" I dislike stripe matching but it always looks so good in the end.
Although there are so many resources out there for stripe matching techniques I thought I'd share a few tips I've learned over time.

First, before you even begin cutting out your fabric, fold your fabric right sides together carefully using pins to line up your stripes. I push the pin through the upper most stripe and carefully flip the fabric over to see if it has come through the stripe in the same location. So another way to say it is that you are individually pinning together all the stripes in chunks.
Above you can see the top side of my fabric on the left and the underside on the right. See how the pin is in the red stripe on top (left picture) and underneath it lines up with the same red stripe (right picture)? I do this, intermittently, all the way down the fold of the fabric.

Second, another trick to make absolutely sure that your pieces mirror each other is to cut one piece and then use that piece as your pattern piece for the mirrored pattern piece. Above you can see that I cut out a piece of the upper yoke and then used that piece to lay on top of the wool and cut the second yoke piece.

Third, one final trick for lining up stripes is to draw directly on your pattern pieces (be sure to take note of the seam allowances and draw beyond them since they can change the final placement of the stripes). When trying to decide how to line the yokes up with the bodice I placed the pattern piece on top of the bodice drawing in where the stripes would come together to see if they were placed well. With this pattern I had to choose one prominent stripe to match since all of them would not match.
You can see that the dark green stripe with the red center is the one that I chose to match. It is squared off.

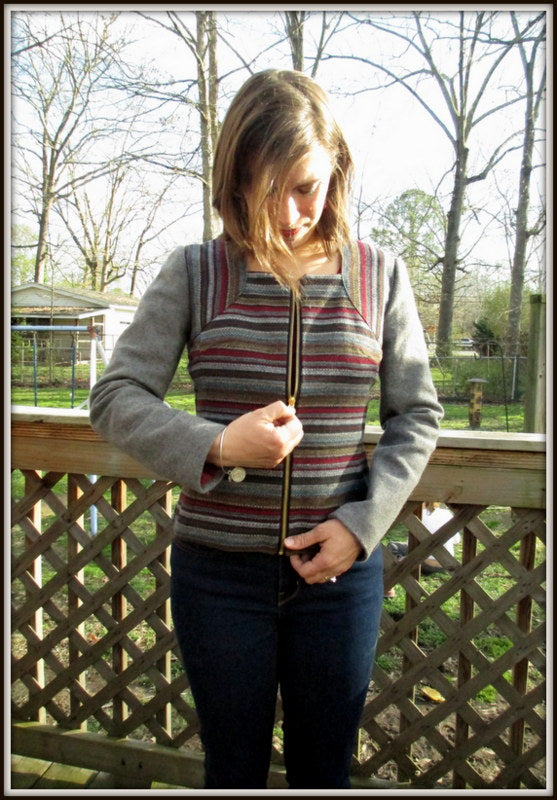
When constructing my jacket I was most concerned about the yoke placement and the front zipper and stripe placement. After hand basting the zipper down I held my breath as I zipped it up, pleading with the stripe gods that all the stripes should match.

When I zipped it up I cheered because they matched perfectly!! Hooray! And I have one final tip for ensuring that you have stripe/zipper matching success. Baste the zipped zipper down to one side of the bodice, and then use chalk to draw on your zipper tape where several prominent stripes land, for example I marked my zipper tape where every dark green/red stripe hit and then unzipped the zipper, pinned it to the other side making sure the chalk marks line up with the same stripe on the opposite side, hand basted and then zipped back up to check it all out.
If you need more resources for stripe matching I recommend the following:
From Colette's Seamwork magazine and Colette Blog
From Katy and Laney
From Mimi G
All of these tutorials are much clearer than mine and should be a big help if this is a new skill for you.

Lets talk construction....
I am by no means a tailoring expert and feel I am still navigating these waters as an advanced beginner. So sometimes that means trial and error and risk taking and just plain making things work!
So the biggest question I had for this jacket was just how structured to make it and what tailoring features to include and what ones to ignore (and what rules to break in the process!).
The first choice I made was to use fusible tricot to stabilize my entire jacket. I went back and forth on this choice for some time and the best help in the process was the Palmer Pletsch Jackets for Real People book. There are so many useful bits of information in that book, I highly recommend it if you are new to tailoring. Somewhere in the book they suggested fusible tricot and I just ran with it.
Another choice I made for stabilizing was to draft a back stay. It may sound complicated but truly it isn't. Here is a tutorial on the Sewaholic site for reference. I think the back stay helps everything hang well and look smooth across the shoulders.


Although I did not feel this jacket needed shoulder pads, I did feel that the sleeve cap could benefit from a little extra support. I used strips of pink fleece to fill out those spots. A tutorial on the SewLisette site further explains how to accomplish this technique using quilt batting. You can find that here.


As far as the pattern goes, everything went together smoothly. I did all my normal grading between sizes adjustments. One big thing to note is that the pattern is described as a "fitted jacket" and I think that this is especially true. I had to let the jacket out a little here and a little there to get the fit right and did this along the way while constructing the jacket. It has plenty of spots where you can adjust the fit- hello back seam and princess seams! While using the sizes that I almost always use for Butterick patterns I found the jacket very close fitting.
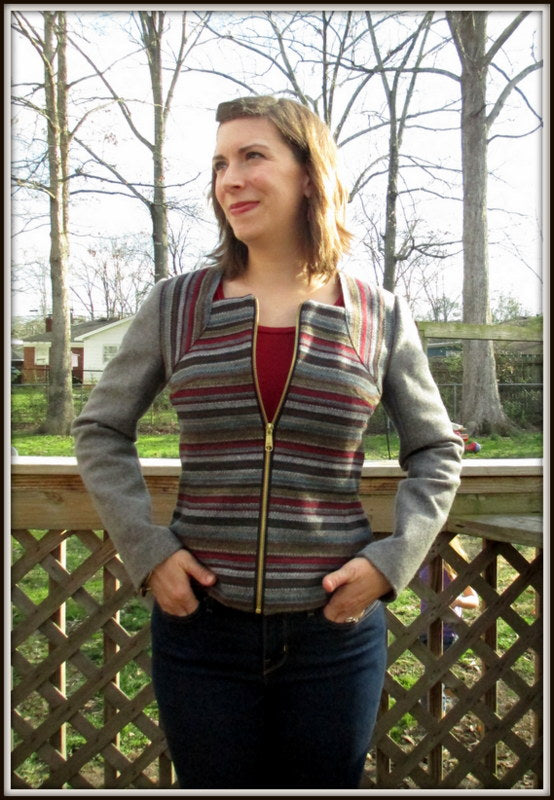

I am so glad that I finished this jacket up, even if it is at the tail end of our southern winter. I know I will wear it a ton in the future and find it such a joy to wear. I am loving the array of colors in this wool and the cranberry red and aqua are two of my very favorites. Can you tell I am soooo pleased!
Cheers to new jackets!
Thanks for reading!
Elizabeth
|
Posted on March 04 2017
Beautiful jacket! It fits you like a glove, and your stripe matching at the zipper is perfect!
Great looking jacket!
Absolutely lovely. Fit, style, color are fabulous. Great job. I am a new garment sewer and you give lots of inspiration. Thanks and BE PROUD!
Thank you Ann!
Beautiful job on your jacket. Stripes looked so perfect.
Thank you Joyce!
Beautiful! Would you consider this jacket more for outerwear? How would it work as part of a suit with coordinating pants or skirt?
Thank you so much and I am so glad I inspired you! The best thing about the online sewing community is all the wonderful inspiration and helpful sewing tips!
Thank you Cathie!
Thank you! I would consider this outerwear but my climate is fairly temperate. Also, it would work perfectly as part of a suit, in fact the pattern includes a really cute skirt.
I love your jacket! The style, just everything about it. It fits you beautifully as it fits the waist perfectly. Thanks for the details on how you constructed your jacket. Great tips that are easy to follow with your illustrations.
Absolutely gorgeous! I love how you worked the stripes for such a great effect.